ZITADEL with Symfony PHP
This integration guide demonstrates the recommended way to incorporate ZITADEL into your Symfony PHP application. It explains how to enable user login in your application and how to fetch data from the user info endpoint.
By the end of this guide, your application will have login functionality with basic role mapping, access the current user's profile and a user list accessible by admins.
This documentation references our example on GitHub.
ZITADEL setup
Before we can start building our application, we have to do a few configuration steps in ZITADEL Console.
Project roles
The Example expects user roles to be returned after login.
Symfony uses ROLE_USER format.
The application will take care of upper-casing and prefixing for us.
Inside ZITADEL, you can use regular lower-case role names without prefixes, if you prefer.
Symfony automatically assigns
ROLE_USERto any authenticated user.
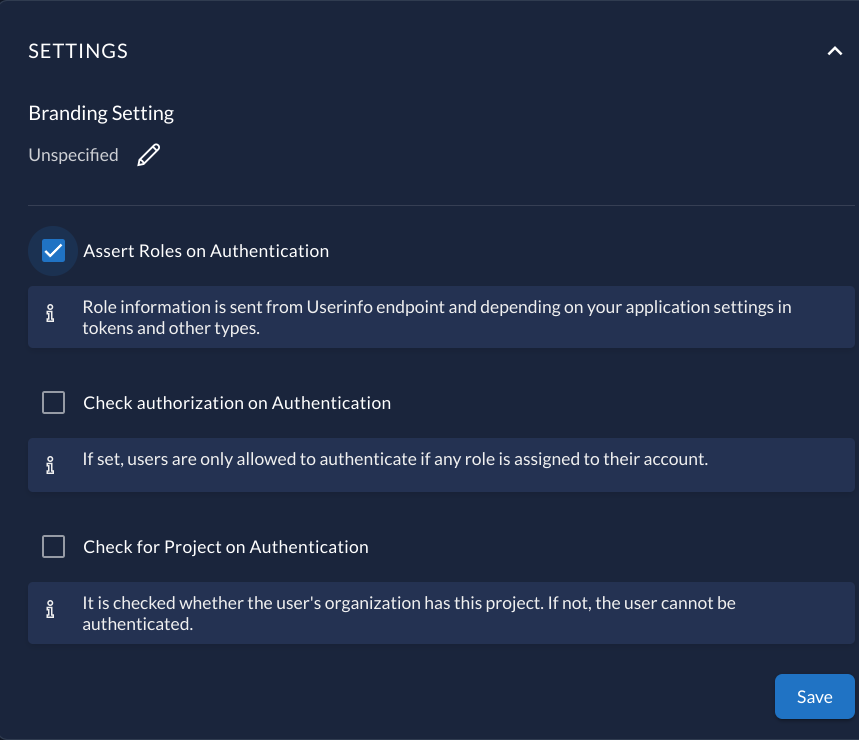
In your project settings make sure the "Assert Roles On Authentication" is enabled.
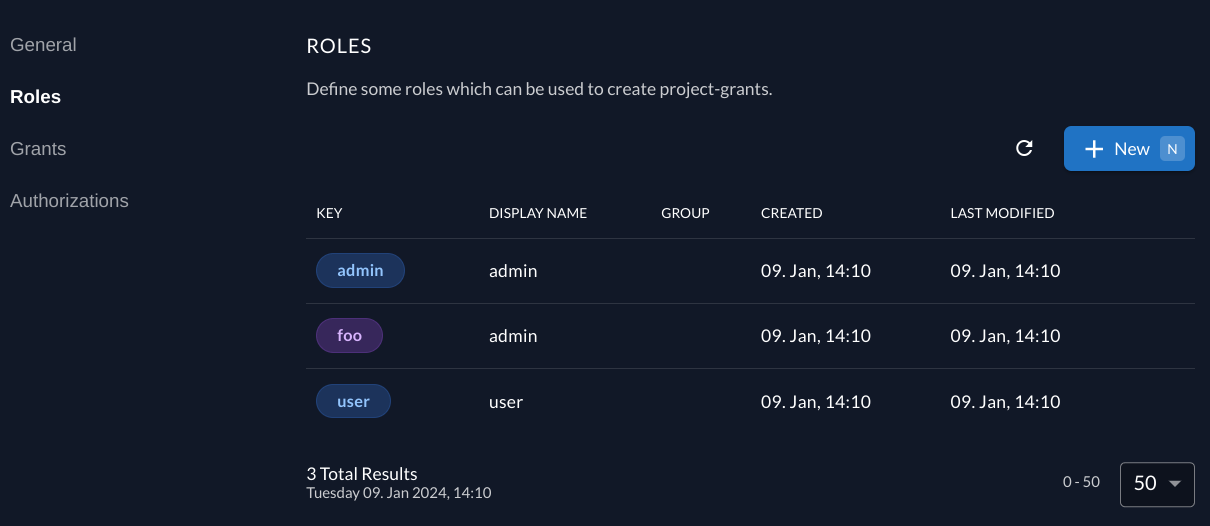
In the project Role tab, add 2 special roles:
admin: Assigned to users that need access to the user list.foo: Random role for display purposes
A user role is not required. This role is assumed by default for any authenticated user in Symfony.
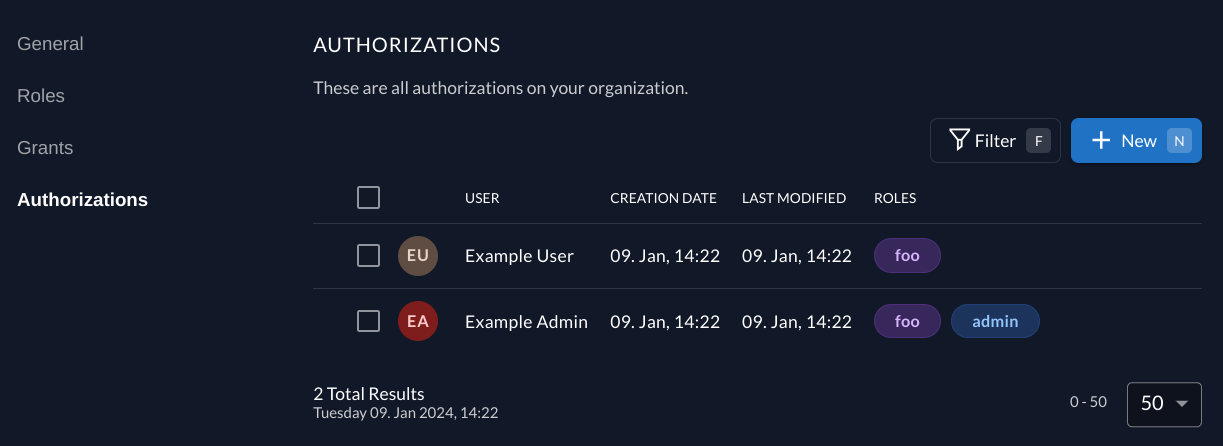
Finally, we can assign the roles to users in the project's authorizations tab.
Set up application and obtain secrets
Next you will need to provide some information about your app.
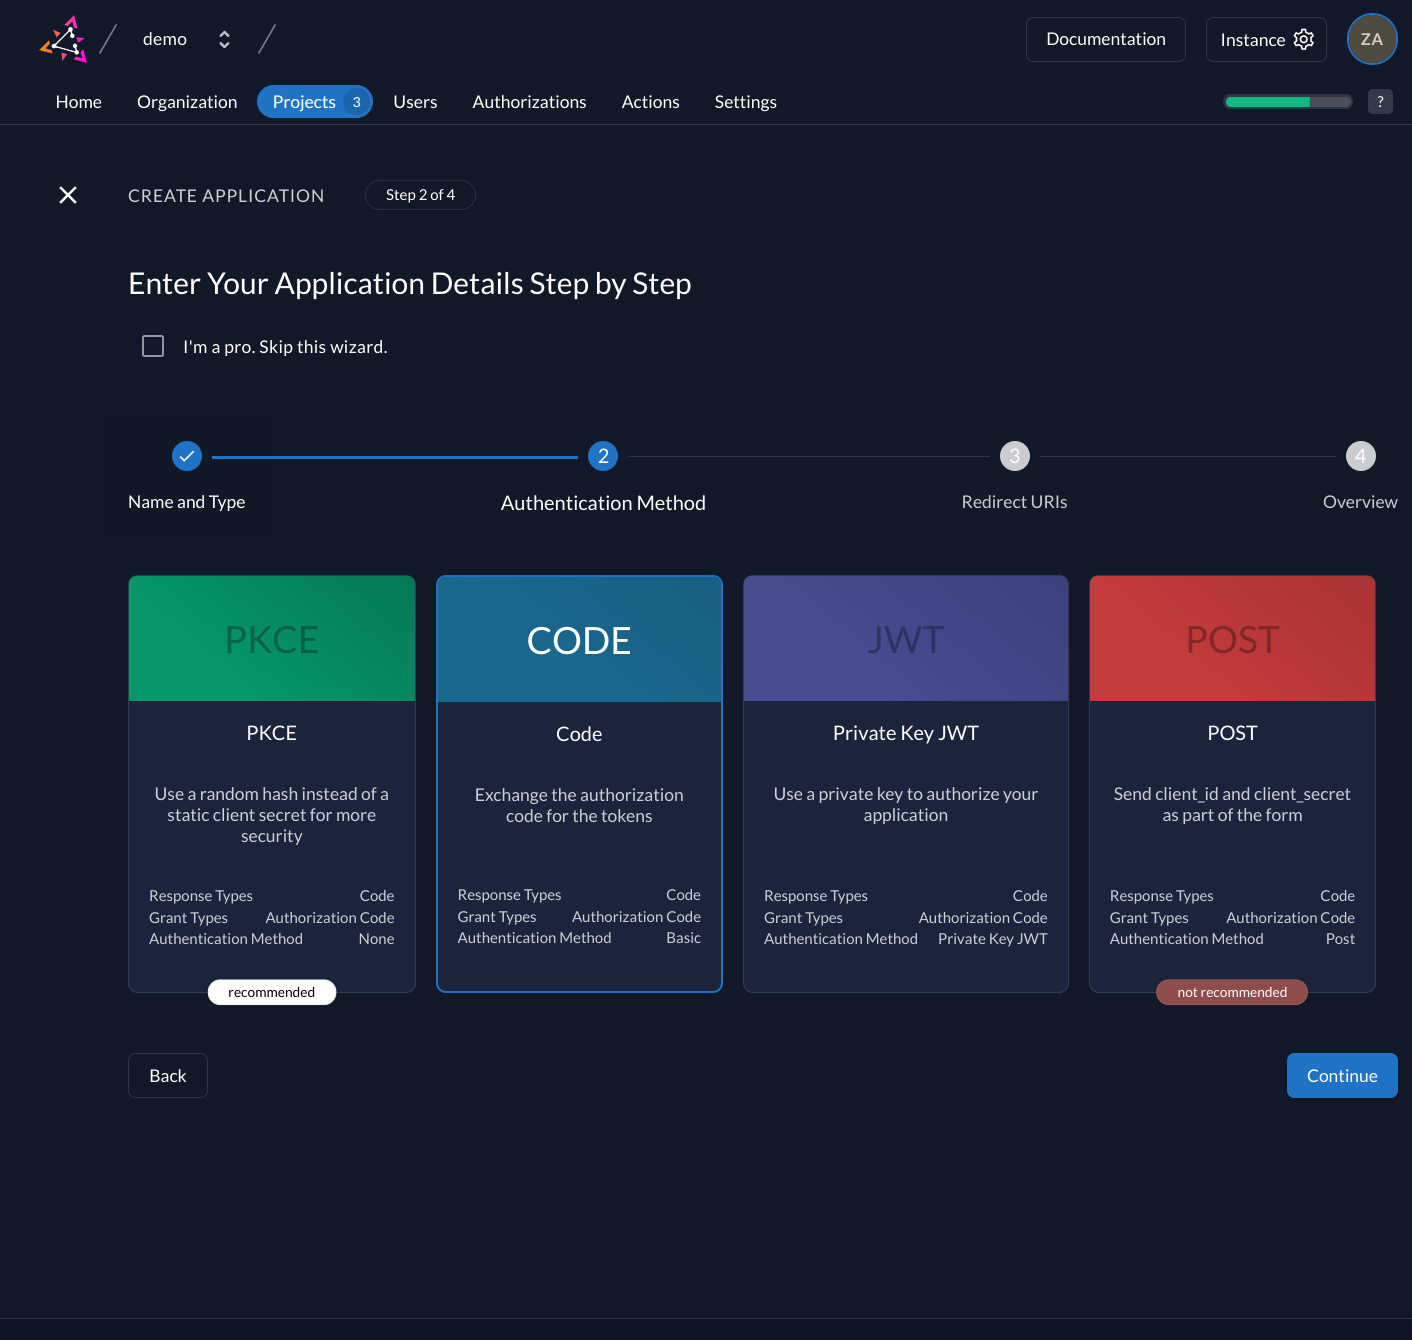
In your Project, add a new application at the top of the page. Select Web application type and continue. We use Authorization Codefor our Symfony application.
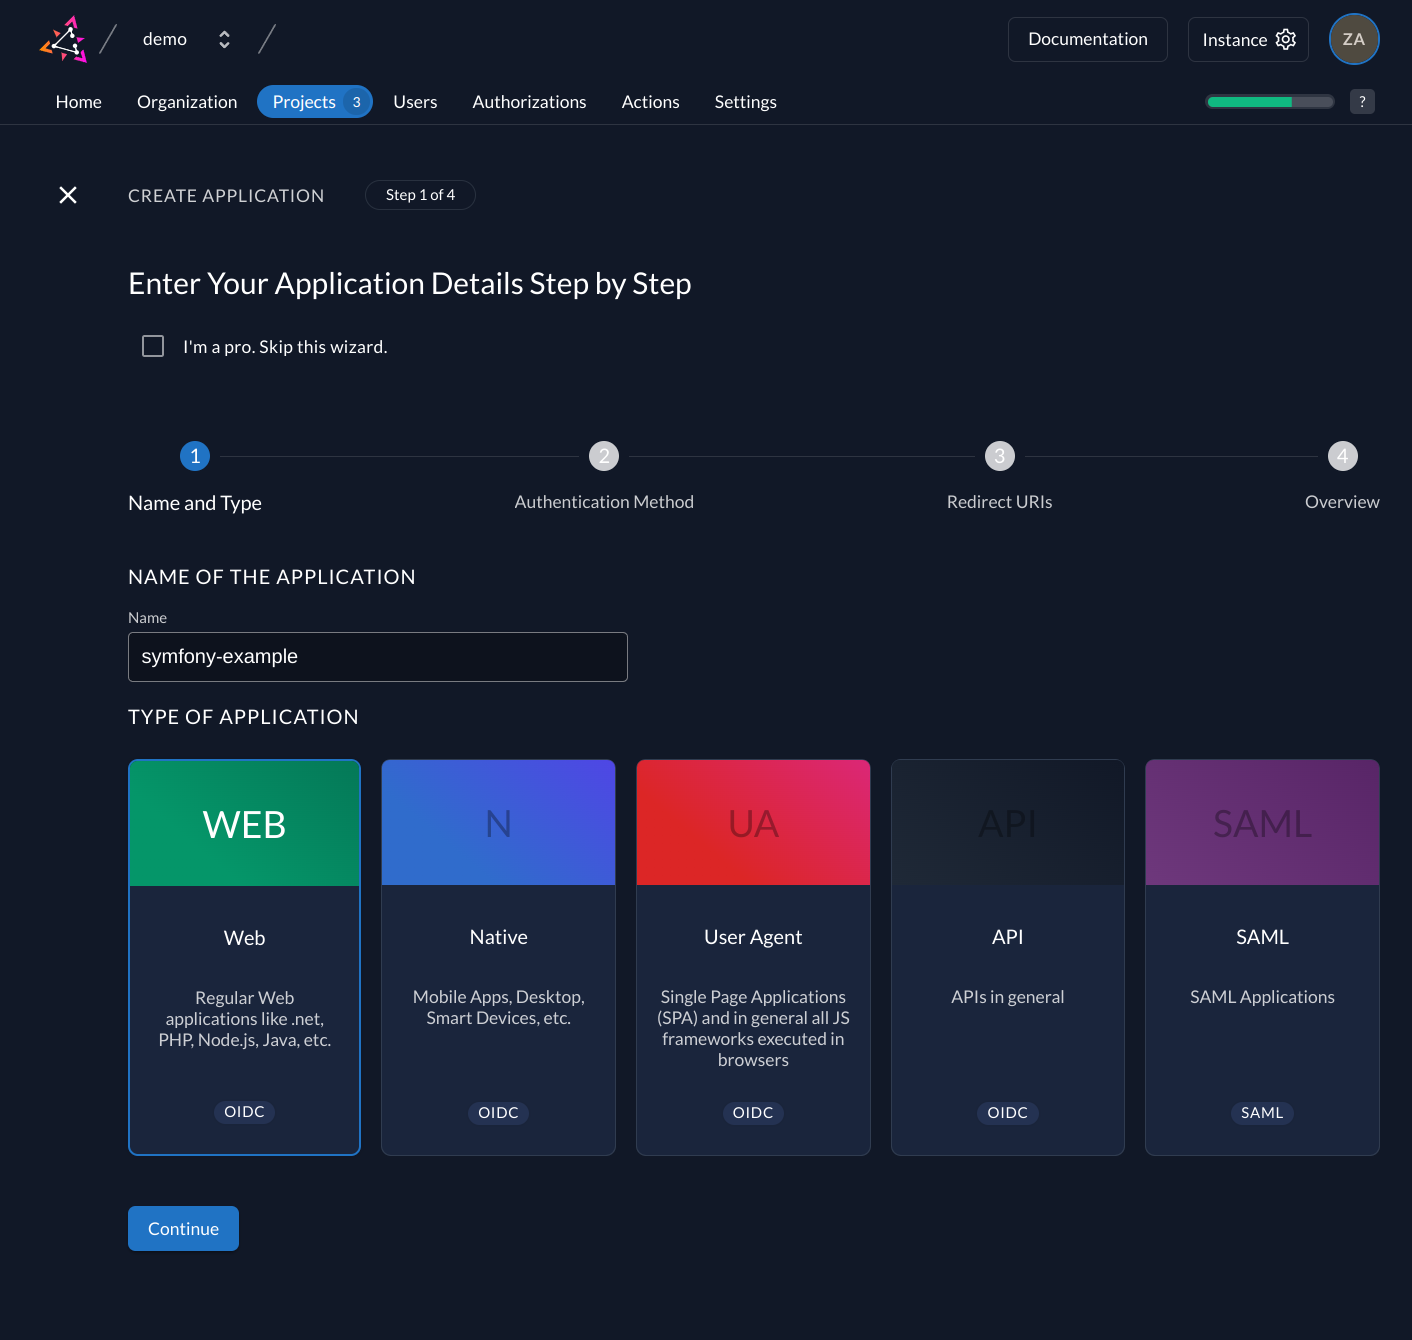
Select CODE in the next step. This makes sure you still get a secret. Note that the secret never gets exposed on the browser and is therefore kept in a confidential environment. Safe the generated
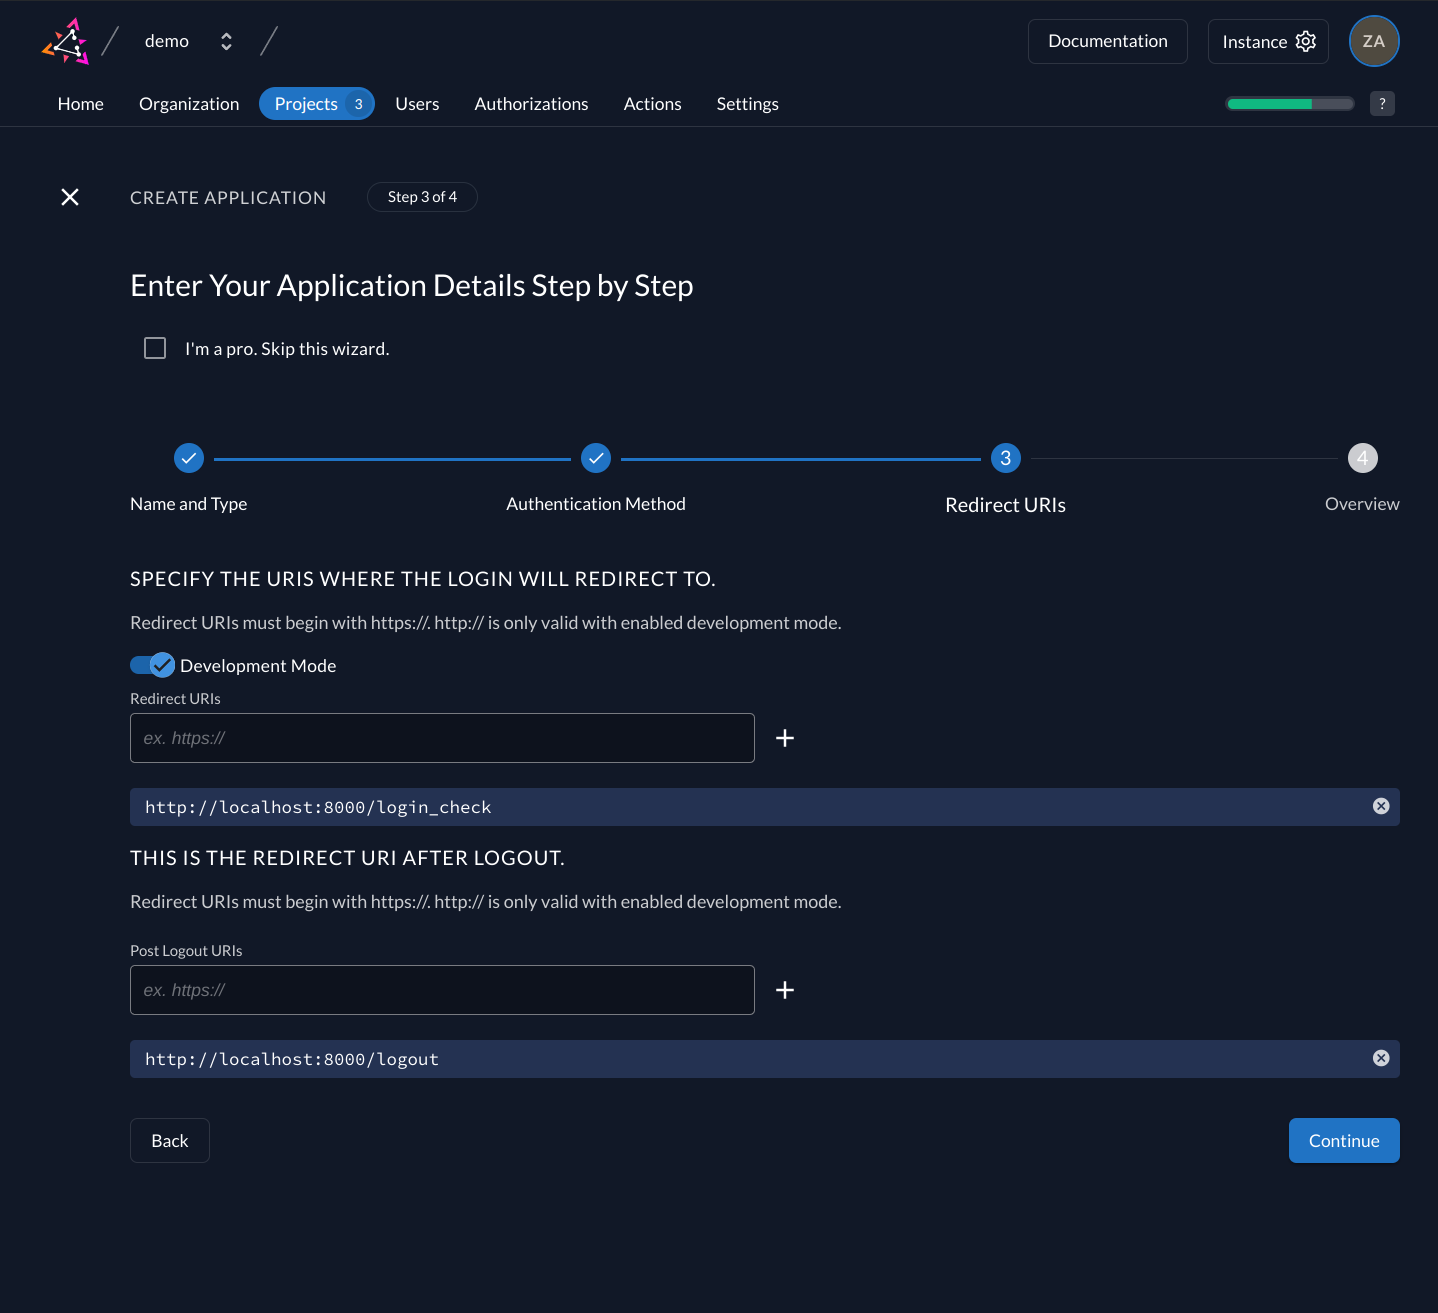
With the Redirect URIs field, you tell ZITADEL where it is allowed to redirect users to after authentication. For development, you can set dev mode to true to enable insecure HTTP and redirect to a localhost URI.
For the example application we are writing use:
http://localhost:8000/login_checkas Redirect URIhttp://localhost:8000/logoutas post-logout URI.
After the final step you are presented with a client ID and secret. Copy and paste them to a safe location for later use by the application. The secret will not be displayed again, but you can regenerate one if you loose it.
Setup new Symfony application
Now that you have configured your web application on the ZITADEL side, you can proceed with the integration of your Symfony client. The example is build on a generated Symfony web app, using the following command:
Skip this step if you are connecting ZITADEL to an existing application.
symfony new my_project_directory --version="7.0.*" --webapp
cd my_project_directory
The remainder of this guide assumes a Symfony project which already includes all web app bundles, such as security, routing and ORM.
If you are using this guide against an existing project you must make sure the required bundles are installed using the composer require command.
Install Symfony dependencies
To connect with ZITADEL through OpenID connect, you need to install the Symfony OIDC bundle. Run the following command:
composer require drenso/symfony-oidc-bundle
Define the Symfony app
Create a User class
First, we need to create a User class for the database, so we can persist user info between requests. In this case you don't need password authentication.
Email addresses are not unique for ZITADEL users. There can be multiple user accounts with the same email address.
See User Constraints for more details.
We will use the User Info sub claim as unique "display" name for the user. sub equals the unique User ID from ZITADEL.
This creates a User Repository and Entity that implements the UserInterface:
You can skip this step, if you already have an existing User object in your project.
php bin/console make:user

 The name of the security user class (e.g. User) [User]:
 > User

 Do you want to store user data in the database (via Doctrine)? (yes/no) [yes]:
 > yes

 Enter a property name that will be the unique "display" name for the user (e.g. email, username, uuid) [email]:
 > sub

 Will this app need to hash/check user passwords? Choose No if passwords are not needed or will be checked/hashed by some other system (e.g. a single sign-on server).

 Does this app need to hash/check user passwords? (yes/no) [yes]:
 > no
Next, extend the User Entity with properties that we will obtain from ZITADEL and use in the application later.
None of the following properties are required for authentication, but show how we can map User Info to a Symfony User Entity later. You can adjust the properties how you wish for your application.
php bin/console make:entity

 Class name of the entity to create or update (e.g. GrumpyElephant):
 > User

 Your entity already exists! So let's add some new fields!

 New property name (press <return> to stop adding fields):
 > display_name

 Field type (enter ? to see all types) [string]:
 > string

 Field length [255]:
 > 255

 Can this field be null in the database (nullable) (yes/no) [no]:
 > yes

 updated: src/Entity/User.php

 Add another property? Enter the property name (or press <return> to stop adding fields):
 > full_name

 Field type (enter ? to see all types) [string]:
 > string

 Field length [255]:
 >

 Can this field be null in the database (nullable) (yes/no) [no]:
 > yes

 updated: src/Entity/User.php

 Add another property? Enter the property name (or press <return> to stop adding fields):
 > email

 Field type (enter ? to see all types) [string]:
 > string

 Field length [255]:
 > 255

 Can this field be null in the database (nullable) (yes/no) [no]:
 > yes

 updated: src/Entity/User.php

 Add another property? Enter the property name (or press <return> to stop adding fields):
 > email_verified

 Field type (enter ? to see all types) [string]:
 > boolean

 Can this field be null in the database (nullable) (yes/no) [no]:
 > yes

 updated: src/Entity/User.php

 Add another property? Enter the property name (or press <return> to stop adding fields):
 > created_at

 Field type (enter ? to see all types) [datetime_immutable]:
 > datetime_immutable

 Can this field be null in the database (nullable) (yes/no) [no]:
 > no

 updated: src/Entity/User.php

 Add another property? Enter the property name (or press <return> to stop adding fields):
 > updated_at

 Field type (enter ? to see all types) [datetime_immutable]:
 > datetime_immutable

 Can this field be null in the database (nullable) (yes/no) [no]:
 > no

 updated: src/Entity/User.php

 Add another property? Enter the property name (or press <return> to stop adding fields):
 >

  Success!
Now edit src/Entity/User.php to add some methods to pretty-print user data later in this example. Add import near the top of the file:
use DateTimeInterface;
And extend the User class with this methods:
class User implements UserInterface
{
    ...

    public function implodeRoles(): string
    {
        return implode(', ', $this->getRoles());
    }

    public function formatCreatedAt(): string
    {
        return $this->created_at->format(DateTimeInterface::W3C);
    }

    public function formatUpdatedAt(): string
    {
        return $this->updated_at->format(DateTimeInterface::W3C);
    }
}
When you are done, the User Entity should look something like:
loading...
Edit the User Repository to have a findOneBySub method, used later for OIDC User Info updates.
loading...
Create a Security Provider
Next you will need to create a Security Provider that integrates the OIDC flow between Symfony and ZITADEL.
Create a ZitadelUserProvider which implements UserProviderInterface, OidcUserProviderInterface and LoggerAwareInterface.
LoggerAwareInterface is optional if you want debug logging.
We called this a
ZitadelUserProviderbecause it carries a custom scope and claim mapping from ZITADEL roles to the Symfony role system.
loading...
You can customize the User Info that is obtained and stored by adjusting the SCOPES constant, the updateUserEntity method and the User Entity.
Controllers and templates
We need to create couple of Controllers and templates to define the app.
Index
The index controller serves a public page on the / route and provides some basic links to the authenticated sections of the app.
loading...
The index template:
loading...
Login
The login controller initiates the OIDC login flow by creating a Auth request and redirecting the user to ZITADEL.
loading...
Profile
The profile controller displays User Info of the currently authenticated user. Any authenticated user will have access to this page.
loading...
The profile template maps the User Entity to a HTML page.
loading...
User list
The user list controller displays all users from the database, that were created during OIDC login. Only users with an admin role will have access to this page.
loading...
loading...
Configure and run the application
Never store and commit secrets in a .env file. Use a env.local file instead and make sure the file is in .gitignore.
Database
Make sure you have a database configured in .env or .env.local. This example uses a local sqlite file to simplify setup:
DATABASE_URL="sqlite:///%kernel.project_dir%/var/data.db"
Create and run migrations:
php bin/console make:migration
php bin/console doctrine:migrations:migrate
Security
A firewall needs to be defined along with roles based access control rules.
In the following example we define the zitadel_user_provider as the security class we wrote earlier. We configure the main firewall to use the zitadel_user_provider and listen for logout requests on the /logout path. We tell the oidc module to enable End Session support.
In the access_control section we protect the /users and /profile routes based on roles. Roles are mapped from ZITADEL to Symfony in the ZitadelUserProvider we wrote earlier.
loading...
OIDC
The generated dresno_oidc.yaml file can be edited to customize behavior of the OIDC bundle. For this example we stick with the default and use environment variables to connect to ZITADEL.
Edit .env.local to contain the details from the Application setup section.
OIDC_WELL_KNOWN_URL="https://tims-zitadel-instance-oj7iry.zitadel.cloud/.well-known/openid-configuration"
OIDC_CLIENT_ID="248680248240075805@dev"
OIDC_CLIENT_SECRET="BJPhEJULSUXseC4geqg5Yg4wWMoy7RgZKar86mbIpt8ZekC5kixMzYGcXLDeeJv7"
The well-known URL needs to be adjusted to your own instance domain.
Activate the route that is used as callback by the OIDC bundle:
loading...
Run
You can use a local Symfony server to test the application.
symfony server:start --no-tls
Visit http://localhost:8000 and click around. When you go to profile you will be redirected to login your user on ZITADEL. After login you should see some profile data of the current user. Upon clicking logout you are redirected to the homepage. Now you can click "users" and login with an account that has the admin role.
Completion
Congratulations! You have successfully integrated your Symfony application with ZITADEL!
If you get stuck, consider checking out our example application. This application includes all the functionalities mentioned in this quick-start. You can start by cloning the repository and defining a .env.local with your settings. If you face issues, contact us or raise an issue on GitHub.
What's next?
Now that you have enabled authentication, it's time for you to add more authorizations to your application using ZITADEL APIs. To do this, you can refer to the docs or check out the ZITADEL Console code on GitHub which uses gRPC and OpenAPI to access data.